the world's most whimsical cookie


Right around this time of year, every year, I take to the kitchen. I play the corniest Christmas music I can find and bake enormous batches of shortbreads, coconut macaroons, chocolate chip cranberry cookies, sugar cookies and caramel pecan squares. (And, in a nod to nostalgia, these.) Then I package them all up in festive tins and give them away to my nearest and dearest. 

To me, it isn't Christmas until I have baked. The homey smell wafting from the oven, the magical transformation of butter and flour and sugar into solid love, the ritual of counting my blessings as I count the cookies – I eat it all up.

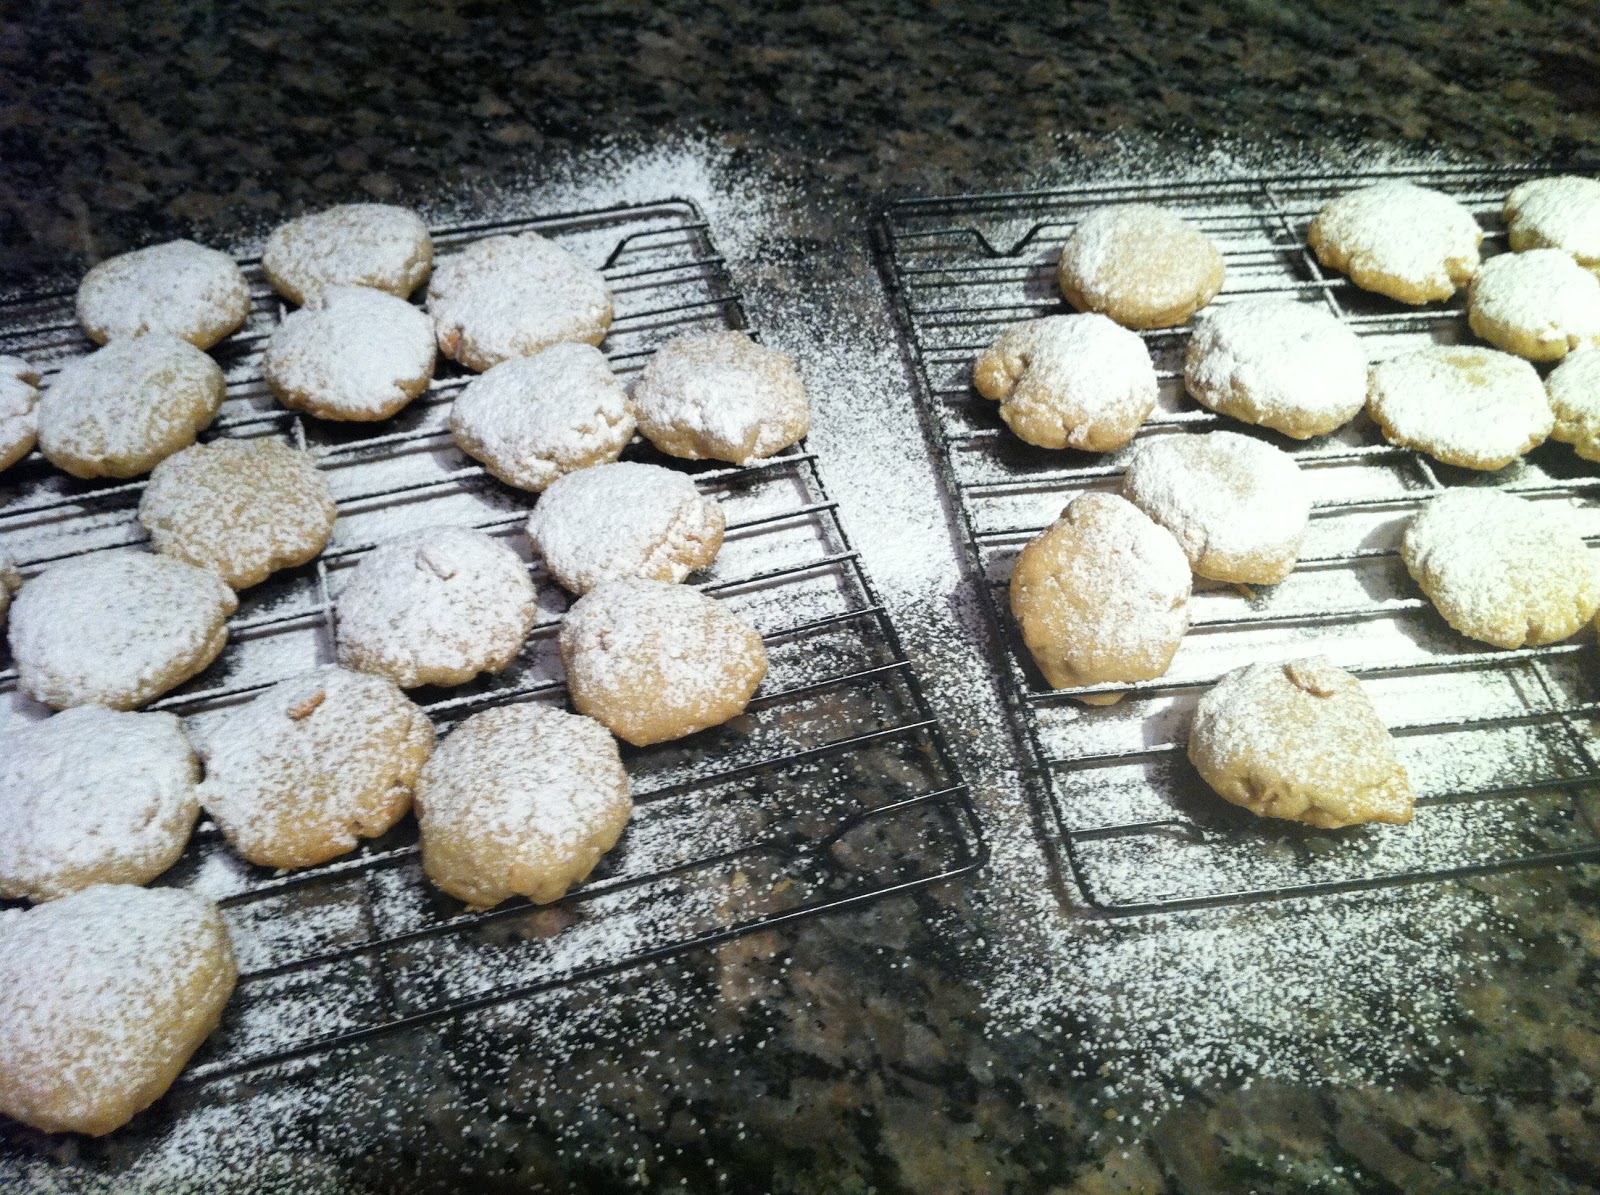
This year, I'm adding a new recipe to the repertoire. Essentially a fancy shortbread, cardamom cloud cookies are an absolute dream. They are easy to whip up, endlessly fragrant and utterly beautiful to look at. And the name! Can you imagine a more poetic name for a cookie?

I like to think that these are cookies to keep rather than give away. Unlike the more obvious, ooey gooey treats of the season – I am looking at you, Hello Dolly bar – these mildly sweet, subtle little bites are best suited for solo contemplation. Feel free to enjoy with an enormous mug of milky tea, with the Love, Actually soundtrack playing cheerfully in the background. And a contented smile on your face.

Clouds of cardamom and cashew cookies
Adapted from Padma Lakshmi's Tangy Tart Hot & Sweet
Makes about 2 dozen cookies

1/2 pound (2 sticks) unsalted butter, chilled and cut into pieces
1/4 cup icing sugar, plus loads more for dusty
2 cups flour
1/2 cup raw crushed cashews
2 teaspoons vanilla extract
1 1/2 teaspoons cardamom powder
1/8 teaspoon salt

1. In a bowl, combine the butter and icing sugar to form a stiff mixture. Add the flour, nuts, vanilla, cardamom powder and salt. Mix well to form a dough. Let stand 30 minutes, covered, at room temperature.
2. Preheat oven to 325 F. Line a baking sheet with parchment paper.
3. Make small balls of the dough and place them on baking sheet. Smash with palm of your hand. Make sure cookies don't touch.
4. Bake for 20-25 minutes, until bottoms are light brown. Remove from oven and dust generously with icing sugar. Cool on racks.

no-effort rice pudding


The thing about cooking is that the less you do of it, the more daunting it seems. And then the lazier you get. 

From time to time (read: often), I get caught up working long hours (read: going to cocktail parties and events after hours) and before I know it it's been weeks since I cooked a proper meal. In spite of the hundreds of cookbooks that litter my home, I forget that I know how to cook. Everything seems just a touch too intimidating. And way too much effort to bother with.

Then I am back to absentmindedly eating sushi for dinner at my desk and looking at coffee and drugstore chocolate as an acceptable lunch. And that, as we all know, is just no way to live. Quite joyless, don't you think? 

To ease myself back into the life of the kitchen, I must keep things very, very simple. A little green salad, dressed with oil and fine balsamic vinegar, and penne tossed with a good solid pesto from the market. Followed by the easiest dessert that can be whipped up and still considered homemade: the little rice pudding that could.

It's the ultimate comfort food, with the least possible fuss. You will find that it is as simple as stirring together a few ingredients in a ramekin and then plopping it in the oven. When it comes out, all warmth and sweetness, it will taste like home. And then you will remember, one more time, that home food truly is the best food – and that it's completely, totally worth the (slight) effort that it takes to prepare it. You'll be back cooking in no time. Promise.

Individual rice pudding
Adapted from Epicurious
Serves 1

1/2 cup of milk, plus a splash for serving
4 teaspoons Arborio rice
2 teaspoons sugar
pinch of salt
pinch of nutmeg
splash of vanilla
butter, for ramekin

1. Preheat oven to 325 F.
2. Butter one ramekin (just under a cup capacity is good).
3. Add milk, rice, sugar, salt, nutmeg and vanilla. Give it a quick stir.
4. Place ramekin on baking sheet and bake, in the middle of the oven, until most of the milk has been absorbed, about one hour. 
5. Cool pudding on rack.
6. Discard skin, stir in extra milk. 
7. I like to bake a little stone fruit to serve on the side, but if this is too much trouble for you, best to leave well enough alone.

in defense of dinner


I'm a sucker for an easy recipe. Give me a handful of ingredients and a couple of easy steps to follow and I am automatically intrigued. I want recipes to be quick and reliable – and to yield food so delicious that you crave it for days after it's all eaten up. And if it looks insanely appetizing on top of all that? Forget about it. 

Pretty sure that this was how home cooks operated for hundreds of years, before we went and made things all complicated for ourselves. Before takeout and prepared foods and restaurants on every block, before the mass exodus from kitchens across North America, people made the same food week after week, year after year. So it had to be fast. And it had to easy. And it had to taste darn good. 

Being the sentimental soul that I am, I often get nostalgic for the days when dinner reigned supreme. In my home growing up, my mother cooked every night and we all sat down together. Her wholesome repertoire – a mix of rustic French country cooking, proper British fare and hippie health food – was the backdrop of our lives. The delicate bacon quiches and the creamy cauliflower soups, the rich shepherd's pies and egg custards, the tasty whole wheat pizzas and sprouted salads, it all infused the mundane routines of daily life with pleasure and comfort and beauty. 

All of this is why I am determined to follow her lead. And what better way to do that than with her recipes? My mother's macaroni and cheese recipe was handed down from her mum – a wonderful home cook – and now she is passing it on to me. This dish is a firm favorite with the family, and it's super simple to throw together. I like to serve it with a fresh salad. Here's the easiest one I know. 

This is humble home food and so one might be reluctant to serve it to guests. But you know what? If there's one thing I've learned over the past few years, it's that we are all starved for a little humble home food. So I'm never surprised when friends see this on the table and breathe a nice long sigh of relief.  


Mum's mac & cheese
Serves 4 small portions

2 tablespoons flour
2 tablespoons butter
1 cup of milk
1 cup grated aged cheddar cheese, plus extra for topping 
1 1/2 cup elbow macaroni
chopped parsley, to taste
grated parmesan cheese, to taste
breadcrumbs, to taste
salt and pepper, to taste

1. Place a pot of salted water on to boil.
2. Meanwhile, melt butter in separate saucepan and then stir in flour slowly, stirring. Brown slightly and take off heat. Stir in milk gradually. 
3. Return to heat and stir continuously until it thickens into a sauce. Remove from heat and stir in cup of cheese. (By the way, for this dish, it's worth shelling out for top quality cheese.)
4. Cook pasta following directions on package, drain and stir in cheese sauce. Season with salt and pepper, to taste. Pour into a baking dish. 
5. Top with bread crumbs, extra cheddar, parmesan and parsley and place under broiler to melt until cheese bubbles and browns.

Insalata verde a.k.a. the easiest salad you'll ever make
Adapted from Williams-Sonoma Rome: Authentic Recipes Celebrating the Foods of the World by Chuck Williams
Serves 4

5 cups of lettuce
3 green onions, white parts only, thinly sliced
salt and freshly ground pepper, to taste
2 teaspoons of red wine vinegar
2 tablespoons of extra virgin olive oil
salt and pepper, to taste

1. Wash and dry greens.
2. Place onions in the bottom of a large salad bowl. Sprinkle with salt and pepper and then add vinegar, then oil.
3. Lay greens on top of dressing and sprinkle with a little more salt. Leave salad for an hour or so while you prepare the rest of the meal.
4. Just before serving, toss the salad well, making sure the leaves are coated in oil. 

breakfast of champions


Before I started cooking, I had all kinds of funny notions about what actually went on in the kitchen. One of which concerned granola. Specifically, I entertained fantasties about making it. The granola that's sold in stores tends to be tasteless and wildly expensive, so I figured that people would love receiving a container of truly delicious homemade cereal for Christmas. I had visions of filling Ikea glass jars and hand painting cards. Thing was, I was sure that the task of making the granola itself would be arduous and complicated and would take hours and hours to complete. So I never did it. 

Then I learned to cook and nothing seemed all that daunting anymore. But for some reason granola was a last, stubborn vestige of the old way of thinking. 

Four years ago, my best friend gave me a wonderfully decadent collection of recipes, Baked, and flipping through it I came across Easy Homemade Granola. I was intrigued. Was it possible that I had it all wrong? Could whipping up granola be something simple and straightforward, more of a casual Tuesday night affair than the holiday mega-project that I had imagined it to be? 

Happy to report that I did have it backwards. Granola is actually easy as pie, and this recipe especially so. It takes minutes – minutes! – to get in the oven. And it fills your home with the tantalizing aroma of cinnamon and sugar and toasted oats, to boot. Plus, it is about a thousand times more yummy than the packaged stuff. I have since made granola as gifts, and people do indeed appreciate it. But it need not be reserved for special occasions. Breakfast is occasion enough. 


Easy homemade granola
Adapted from Baked: New Frontiers in Baking by Matt Lewis and Renato Poliafito
Makes: 1 pound of morning goodness

2 cups rolled oats
1 teaspoon cinnamon
1/2 teaspoon salt
3 tablespoons plus 1 teaspoon vegetable oil
1/4 cup honey
1/4 cup firmly packed light brown sugar
1 teaspoon vanilla extract
1/3 cup almonds
1/3 cup cashews
1/3 cup pecans
1/3 cup dried sour cherries

1. Preheat oven to 325 F. Line a baking sheet with parchment paper.
2. In a  large bowl, toss the oats with cinnamon and salt.
3. In a medium bowl, stir together the oil, honey, brown sugar and vanilla. Whisk until completely combined.
4. Pour the honey mixture over the oats mixture and use your hands to combine until all oats are covered in honey.
5. Pour mixture on baking sheet and spread out, leaving a few clumps for texture.
6. Bake for 10 minutes, then remove from the oven and use a metal spatula to lift and flip the granola. Sprinkle the almonds over granola and return to oven.
7. Bake for 5 minutes, then remove from oven and flip granola again. Sprinkle on the pecans and cashews and return to oven.
8. Bake 10 minutes then remove from oven. Let cool completely. Sprinkle the dried cherries over the granola and use your hands to transfer to an airtight container. Granola will keep for one week.

paradise for plant-eating pals


Sometimes things are just so right. Like when you put on a new album, and within seconds of when the beat drops you know that it's going to be everything you'd hoped for. You know that you will forget that you are listening to music at all, in fact, and instead just experience the vastness of life. You know? Or when you pick up a new book and just a few pages in, you have to stop and sigh in contentment because you have absolute confidence that you're in good hands. You know that the story is going to draw you in and allow you to lose yourself in the wonder of it all.

I love that feeling. I love it when people make beautiful things and then send them out into the world to give others joy. 

That's exactly what I thought about when I took the first bite of this dish. A friend had recommended Alice Hart's gorgeous cookbook Vegetarian and this was the first recipe I tried. Insanely delicious, my friends. The flavour was so good it was almost shocking, each element in perfect harmony with the others. 

People are eating a lot less meat these days, so I am always looking for inventive vegetarian recipes to feed friends. If you have any plant-eating pals hanging around, feeling slightly forlorn about the steady diet of veggie burgers and tomato pastas they get served in restaurants, feel free to knock their socks off with this.

Warm couscous salad with preserved lemon & charmoula
Slightly adapted from Vegetarian by Alice Hart
Serves 4

4 young parsnips
3 red peppers, deseeded and sliced
2 tablespoons olive oil
2 tablespoons honey
2 preserved lemons, quartered
1 cup Israeli couscous
1 batch of charmoula (recipe to follow)
juice of 1 lemon
one small bunch of cilantro, leaves only
3/4 cup of Greek yogurt
salt and pepper, to taste

1. Preheat oven to 400F. 
2. Slice the parsnips lengthwise into halves or quarters depending on their size. Place in a roasting pan with the red peppers and coat with the olive oil and honey. Season with salt and pepper and roast for about 35 minutes, until caramelized. 
3. Slice the flesh from the preserved lemons and discard. Cut peel into strips.
4. Cook Israeli couscous according to instructions on package.
5. Combine the roasted parsnips and peppers with the cooked couscous and add 1 tablespoon of the charmoula, along with the preserved lemon peel, lemon juice and most of the cilantro.
6. Ripple the remaining charmoula through the yogurt and serve spooned onto the salad. Garnish with the rest of the cilantro.  

Charmoula
1 small bunch cilantro
1 small bunch parsley
1 tablespoon cumin seeds, toasted
finely grated zest and juice of 1 lemon
1/4 cup extra virgin olive oil
1/2 teaspoon salt
1 garlic clove, crushed
1/2 teaspoon paprika
pepper, to taste

1. Finely chop cilantro and parley. 
2. Combine with the rest of ingredients. If it seems too thick, add extra olive oil. Season with pepper, to taste. 
3. Keeps, covered in the fridge, for up to 2 weeks. 

big bowl of happiness


Well, it's finally soup season folks. Personally, I couldn't be more thrilled. There's something about this time of year – the chill in the air, the sudden need for scarves, the shorter days, the cold rain – that makes me want to rush home and stir a pot of soup. I've taken to making enormous pots every Sunday, so that on gloomy, cold autumn weeknights I don't have to wait for my supper. 

Since I fancy myself something of a French woman in training, of course I start every meal with a simply-prepared vegetable course: grated carrots in vinaigrette, a little cabbage coleslaw or perhaps some savory corn pancakes. These days, I always follow this with soup. Butternut squash, Parisian mushroom, mixed vegetable, potato and leek, beef brisket in broth with noodles. But the most comforting recipe in my repertoire is this creamy cauliflower and garlic soup. Unbelievably tasty and satisfying.  

I can't say that it's a lightening-quick meal to prepare, since it has multiple steps and a cooling period – so please understand that this is a weekend project. But I can tell you that your efforts will be rewarded all week long, and you will thank yourself many times over as you sit down to steaming bowls of this soothing soup. 

Roasted cauliflower and garlic soup
Adapted from Clean Start by Terry Walters
Serves 6

2 heads cauliflower
4 tablespoons olive oil, plus extra for rubbing garlic
1 garlic bulb
1 cup diced sweet onion
2 tablespoons mirin
2 teaspoons sea salt
4-6 cups water
2 tablespoons fresh thyme leaves
ground pepper, to taste

1. Preheat oven to 350F.
2. Chop cauliflower and drizzle with 2 tablespoons of olive oil; toss to coat. Place on two parchment paper-lined baking sheets. Cut off top of garlic, rub entire bulb with oil and wrap in foil. Place all in oven and roast for about 1 hour, or until soft, tossing cauliflower occasionally. Remove from oven and set aside.
3. When garlic is cool enough to handle, separate cloves, peel, discard skins and set aside.
4. In large soup pot, over medium-high heat, saute onion in 1 tablespoon of olive oil until translucent (about 5 minutes). Add roasted cauliflower and garlic, mirin, salt and 4 cups of water. Increase heat and bring to a boil. Reduce heat and simmer 5 minutes. Wait until soup cools and puree in blender. If soup is too pasty, add 1-2 cups of water until desired consistency is achieved.
5. Return to heat, stir in 1 tablespoon thyme leaves and pepper, to taste. Simmer 20 minutes to allow flavours to blend. Remove from heat and stir in remaining tablespoon of oil. Garnish with remaining thyme leaves and serve. 

celebration chocolate pots


Do you ever get the feeling that you are right where you are meant to be – at the right place, at the right time, doing exactly what you are meant to be doing? As it turns out, I often feel that way when I bake these chocolate pots. I love everything about them: the elegant look, the heavenly smell, how happy they seem to make people. And obviously the decadent, brownie-like tops and the rich pools of chocolate pudding lurking within are nothing to sneeze at either. 

Clearly I have developed a sentimental fondness for this sweet little dish. I think it's because I've served them over and over to people that I am fond of, and they've become something of a tradition in my circle. 

I had a friend over for dinner the other night and I took great pleasure in introducing her to this recipe. As I told her, what's especially lovely about these is how well they work for dinner parties. Whip them up early and then cover in plastic wrap and stash in the fridge while you make the rest of the menu. About an hour before dinner, preheat the oven, take them out of the fridge and allow to come to room temperature. When dinner is served, put them in the oven to bake. As people finish eating they will begin to smell the aroma of chocolate. I guarantee you will enjoy the looks on their faces. Leave little gems to cool while you make the coffee, and then serve them to your drooling diners. And feel free to play a little Otis Redding while you're at it. Or perhaps some Mingus

This recipe is, of course, from Nigella Lawson, a woman who knows a thing or two about desserts. Not to mention the art of living. (Hint: happiness has nothing to do with pointless depravation. Not one single thing.)

Chocolate Pots, aka easiest dinner party dessert ever
By Nigella Lawson, makes 4 
¾ cup semisweet chocolate chips
just over a stick of soft, unsalted butter
2 eggs

¾ cup of sugar
3 tablespoons flour


1. Preheat oven to 400F.
2. Place a metal bowl over a pot of gently boiling water. Add the chocolate chips and the butter and allow to melt slowly.
3. Use the wrapper from the butter to grease four ramekins (just under a cup volume each).
4. Cool the melted chocolate mixture.
5. In a mixing bowl, beat eggs.
6. Add sugar and whisk.
7. Spoon in flour and whisk. 
8. Fold the cooled chocolate into the egg mixture and stir to combine.
9. Pour into ramekins, place on baking sheet and cook for about 20 minutes, until top is cracked. (Middle should still be gooey and molten.)
10. Cool chocolate pots for 15-30 minutes and serve.

OMG polenta


Something happened last night that has never happened before. I improvised a recipe – and it kinda worked! I have always been the type of home cook who follows recipes, making changes here and there to tailor dishes to my palate. I cook this way because I have to. Up until very recently, if I went off book it spelled disaster. (I'm not being modest. Actual gong shows have occurred and were then plated and served to unsuspecting family and friends.) Anyway, for years now, I have accepted the fact that in the kitchen I must do as I'm told. The backbone of what I cook must come from someone else.

Not to make too big a deal out of this (watch me do it anyway), but lately something has shifted. I've been trying new things and the wheels aren't coming off the bus. Maybe it's that I've been shopping more at local, outdoor markets and really focusing on gathering exquisite ingredients and pondering how these flavours and textures could play off each other. Maybe it's that I have spent years in the kitchen and all those hours of experience are finally starting to mean something. Maybe it's that I own a ridiculous number of cookbooks and spend a good portion of my time studying them. (Osmosis, anyone?) Who knows what exactly it is, but the point is that I came up with a new dish tonight. And it actually tasted halfway decent. 

I started by following the instructions on the package of corn grits and then let a combination of what I was craving and what was in my fridge guide me from there. When I sat down to eat, I felt unbelievably amped. Like a cross between Jay-Z (best rapper alive) and Martha Stewart (if she was slightly more emotive). As for the below, you're welcome.

Breakthrough polenta
Serves 2 (with leftover plain polenta for lunches)
3 cups water
1/2 teaspoon kosher salt
1 cup organic corn grits
1/3 cup freshly grated parmesan
2 tablespoons butter
1 teaspoon olive oil
1/2 small red onion, diced
3 fresh shiitake mushrooms
1/2 mildly spicy smoked sausage, sliced
1 cup frozen fava or edamame beans, cooked according to instructions on package
1/3 cup good quality pesto
1 teaspoon of flat leaf Italian parsley, chopped

1. Set a large saucepan of water on medium heat, add salt. When the water is boiling, pour in the corn grits and stir, almost continuously, until polenta is very thick (about 25-30 minutes). If polenta gets lumpy or too thick, whisk vigorously and add hot water until consistency is creamy and smooth.
2. In the meantime, pour oil in frying pan and set over medium heat. When hot, add diced onion.
3. When onions are translucent, add mushroom and sausage. 
4. When mushrooms and sausage have browned, add edamame or fava beans and allow flavours to mingle for 2 minutes.
5. When polenta is done, stir in parmesan and butter.
6. To plate, create a bed of polenta and top with onions, sausage, mushrooms and beans. Drizzle pesto on dish and garnish with parsley. Feel inordinately pleased with yourself and immediately text your foodie friends with photos.

more brunch bliss


A chef I once met told me that there are two kinds of people in the world: those who wake up in the morning thinking about what they are going to eat that day – and those who don't. You probably don't have to guess which one I am. But you should know that left to my own devices I take things even a step further than that. I spend much of the week daydreaming about what I'll eat on the weekend. Then I go ahead and plan my entire social schedule around such hankerings. (Can I get an amen?)

It's true, the middle of the week often finds me flipping through cookbooks looking for novel brunch dishes with which to entertain myself and others. I found these Cottage Cheese Pancakes a few months ago and quickly incorporated them into my repertoire. Topped with a fresh fruit compote and a dollop of Greek yogurt, they taste a lot like cheese blintzes. But less heavy (and containing less sugar than many stir in their coffee). In short: seriously tasty, folks. And since these pancakes require such basic ingredients – and can be whipped up in a matter of minutes – you don't even have to plan all week for them. But you'll probably want to.

Cottage Cheese Pancakes
Adapted from The Whole Foods Market Cookbook
Serves 2
2 eggs, beaten
1/4 cup cottage cheese
1/4 cup all-purpose flour
2 tablespoons sugar
1 tablespoon butter

1. In a bowl, mix together egg, cottage cheese, flour and sugar. 
2. Heat a non-stick pan over medium heat and melt butter.
3. When butter sizzles, drop batter by spoonfuls into pan. Cook on both sides until lightly browned.

Strawberry Compote
Serves 2
2 handfuls of strawberries, hulled and sliced
pinch of sugar
fresh mint leaves, torn

1. Place strawberries in a saucepan, add sugar and cover with water. 
2. Heat over medium heat until the sauce reduces and thickens. 
3. Serve garnished with mint.

soup for all seasons


For many years, I did not know how to cook. It was a sad state of affairs. I desperately wanted to learn, but I had no idea where to start. I would walk down the aisles at the local market and stare longingly at jars of rustic soup. I had fantasies of stirring bubbling pots that would fill my home with mouth-watering aromas. 

If only I'd known how easy cooking was. How I learned to cook is a story for another day – but today I want to assure all you anxious newbies out there that homemade soup is very much within your reach. Seriously. Even if you have never set foot in a kitchen before, I am confident that you can make this. 

This is one of the simplest soups I know. I throw it together often in the winter, but really it's just as good in any other season. The backbone is from Mark Bittman's Food Matters. His book makes the argument that eating vegan some of the time (specifically until 6 p.m. every day) is better for your waistline, your overall health, the planet – and, not insignificantly, your pocketbook. In keeping with that spirit, I make it vegan sometimes and not others. 

This dish is brilliant in how adaptable it is. You can make it with water, chicken stock, vegetable stock, or water and a vegetable bouillon cube. You can add canned beans or chickpeas. Canned tomatoes or fresh both yield delicious results. Chili flakes give it some spice. Cooked sausage or grated parmesan dress it up, especially on day two or three when you may be getting bored of it. Cooked potatoes give it heartiness. Cooked macaroni instantly transforms it into comfort food. Parsley lends it a springtime freshness. You get the idea. You have loads of options here, so feel free to choose your own adventure.

Basic Vegetable Soup
Adapted from Food Matters
Serves 4-6
3 tablespoons of olive oil
1 medium onion, chopped
1 carrot, chopped
1 celery stalk, chopped
2 garlic cloves, diced or put through garlic press
salt and freshly ground pepper, to taste
6 cups of water or stock
3 medium tomatoes, peeled, seeded and chopped or one can of roma tomatoes with juices
4 to 6 cups of quick-cooking vegetables (such as zucchini, green beans, corn, kale ect.)
1/2 cup of boiled, chopped potatoes
1/2 cup of chopped parsley

 1. Heat 2 tablespoons of olive oil in a soup pot over medium heat and then add the garlic. When the garlic starts to smell fragrant, add the onion, carrot and celery. Sprinkle with salt and pepper and cook, stirring, until the onion softens, about 7 minutes.
2. Add the stock, tomato and remaining veg; bring to a boil then lower the heat so the mixture bubbles.
3. Cook, stirring occasionally, until all of the veg are very tender, 15 to 20 min. Taste and adjust the seasoning. Add the remaining tablespoon of olive oil and serve, ideally with a loaf of crusty bread.

sweet nothings


Like small children, I would prefer to have dessert after every single meal. But we can't all get what we want all the time, now can we? And anyway, we wouldn't enjoy it very much if we did. 

The truth is that I don't feel great when cakes are in regular rotation, and I'm not a fan of struggling into tight clothing. Plus, whenever I overdo anything it gets a bit dull and mindless. So as much as I would like to follow every summer salad with a chocolate torte, these days I'm trying to save indulgences for special occasions. But that doesn't mean I can't satisfy my sweet tooth on a daily basis – and really savour the experience. Call it having your cake and eating it too. 

I have discovered that you can eat something sweet every night without throwing yourself out of balance. The secret is to trick yourself with fruit-based, healthy concoctions. (Thank you, Mireille Guiliano.) This is easy to pull off during the summer, when markets are brimming with all things juicy. Behold this little slice of heaven:

Peaches & Cream, the remix
Serves 1 delighted diner

1 peach, sliced in bite-sized pieces
1/2 tablespoon of brown sugar
1 tablespoon of Greek yogurt
1 teaspoon of milk
pinch of cinnamon
several mint leaves, torn

1. Turn on the broiler of your oven.
2. Line a baking sheet with parchment paper, arrange peach slices on top and sprinkle a pinch of sugar on each piece.
3. While the peaches are caramelizing under the broiler, thin the yogurt out with the milk and stir in the cinnamon.
4. When peaches are browned slightly and bursting with flavour, remove from oven. Cool slightly, drizzle with cinnamon cream and sprinkle with mint. 

lovely lentil salad


This is my confession: I have lunch issues. For real. I never know what to eat. Breakfast is simple and dinner is fun – but what exactly should one eat for the midday meal? I don't like eating out, and especially not on the run, so I always try to pack something. But at best, these brown bag provisions are uninspired. At worst, totally unappetizing. A few pieces of fruit, a halfhearted sandwich. Yawn. The utter boredom leads to not eating. And then, later on, scarfing down fistfuls of whatever candy is on offer at the office. 


So you can imagine my delight when I found a truly stupendous lentil salad dressing recipe over at one of my fave blogs.


At first, the dressing seemed overly complicated (9 spices, really?) but it turned out to be easy peasy to whip up. When I tasted it, I had a bit of a Eureka moment. The dressing is intensely flavourful, with just the right amount of heat. And so this lentil salad has swiftly become a standby. What I like most is how much you can vary the recipe. Sometimes I scatter the seasoned lentils over mesclun, other times aruglula. I add some roasted red peppers, goat cheese or parsley. Sometimes I just eat the lentils plain, with a side of cut veggies. The options are endless. All that's required is a jar of this delicious dressing in the fridge and some lentils on hand, and viola!, goodbye lunchtime doldrums.


Lovely lentil salad
Adapted from My New Roots
1 cup of green lentils (or, better yet, fancy French Du Puy lentils) 
1/3 cup olive oil
1/4 cup apple cider vinegar
1 tablespoon maple syrup
1 tablespoon Dijon mustard
2 teaspoon salt
2 teaspoon pepper
1 teaspoon ground cumin
1/2 teaspoon turmeric
1/2 teaspoon ground coriander

1/2 teaspoon ground cardamom
1/4 teaspoon cayenne pepper
1/4 teaspoon ground cloves
1/4 teaspoon freshly grated nutmeg
1/4 teaspoon ground cinnamon


1. Rinse lentils. Fill a pot with water, bring to a boil. Boil lentils for approximately 20 minutes or until al dante. Drain.
2. Combine the rest of the ingredients in a bowl and whisk.
3. Toss the lentils with the dressing, to taste. (Store leftover dressing in fridge; will last a few days).  
4. Serve the lentils over greens of your choosing. Add whatever else you like. Smile as people in your lunchroom admire your gourmet handiwork. 

icing on the cake


If I care about you, I will bake for you. And, sooner or later, chances are good that I will make you these cupcakes. I have been baking them for years. I've whipped them up for office celebrations, dinner parties, kids' birthdays – and once, for a wedding of 60. It remains one of my favourite ways to express affection for family and friends. 

The recipe is as simple as it gets. And almost as quick as one of those soulless, synthetic boxed cakes. In short, the perfect gift to give.  


Butter Cake (adapted from The Laura Secord Canadian Cookbook)
Makes 12 cupcakes

1 1/2 cup all purpose flour
1/2 tsp salt
2 tsp baking powder
1/2 cup butter
1 cup sugar
2 eggs
1 tsp vanilla
3/4 cup milk

1. Preheat oven to 350F.
2. Line muffin tins with paper cups.
3. Sift together flour, salt and baking powder.
4. In a separate bowl, cream butter.
5. Gradually blend in sugar, eggs and vanilla. Beat until light and fluffy.
6. Add dry ingredients to butter mixture alternately with the milk. Make 3 dry and 2 liquid additions.
7. Spoon batter into muffin cups. Bake for about 20 minutes, or until bottoms are golden brown and cake springs back when lightly touched (a toothpick should come out clean).
8. Cool and then spread with basic butter icing.

Basic Butter Icing
Makes enough for 12 cupcakes

1/4 cup butter, room temperature
2 cups icing sugar
1 1/2 tbsp milk or cream
1 tsp vanilla

1. Cream butter.
2. Gradually blend in icing sugar.
3. Add milk (or cream) and vanilla.

best ever chocolate chip cookies


Growing up, my dad always said that the only constant in life was change. But, as it turns out, the only constant in my life is Jon Stewart. That, and chocolate chip cookies. To my mind, there are few things in the world more comforting – more steadfast – than warm cookies and a tall glass of milk. And a side order of deliciously smug political satire.

I copied this recipe from a friend (I think she got it from The Fanny Farmer Cookbook) about 12 years ago and have carried it around ever since.


I'm moved cities, I've moved jobs, new people have come into my life – but I've always made these cookies. They're the perfect combination of crisp and chewy, and are generally a hit with kids and adults alike. I skip the nuts, but at Christmas, when I bake a tin of treats for everyone that I'm close to, I add cranberries.

When I take these cookies to parties, I often reserve a small amount of dough in the fridge. That way, when I get home, I can crank up the oven and indulge in a late-night treat. It's nice when some things stay the same, no?

Best Ever Chocolate Chip Cookies

1 1/8 cup flour
1/2 cup butter
1/2 cup dark brown sugar
1/2 cup granulated sugar
1 egg
3/4 teaspoon vanilla
1/2 teaspoon salt
1/2 teaspoon baking soda
1 cup semi-sweet chocolate chips
1/2 cup nuts (optional)

1. Preheat oven to 375 F.
2. Cream butter and add sugars. Beat until light and smooth.
3. Add vanilla and egg.
4. In a separate bowl, mix flour, salt and baking soda.
5. Add dry to wet. Stir until combined.
6. Add chocolate chips (and nuts, if using).
7. Drop spoonfuls on a cookie sheet and bake 8-10 minutes, until lightly browned.

no-fuss supper (after a fancy weekend)


I don't know about you, but nine times out of ten I prefer home food to restaurant food. It tends to be healthier, cheaper and more delicious. It's nourishing and comforting and uncomplicated. Plus, for me, it usually includes vegetables, which I suspect are the answer to every problem in life. 


Still, the social world is not conducted in my kitchen, and so every now and then (read: at least once a week) I find myself donning a dress and marching off to the hot spot du jour to sample award-winning cheese plates and handmade donuts. I relish these outings. I like the energy, the excitement, the polish of the patrons, the boisterous table talk. And, occasionally, one even winds up getting served superb food. Last night, for instance, during a long dinner on a breezy patio, I drank pink lemonade and ate the juiciest burger I've ever had, with salty fries and a tiny little salad designed to make me feel better about the fries. Followed by two decadent desserts. 


But after such brazen indulgence, I am back to craving home food. Tonight I wanted something refreshing and light. Preferably requiring only one pot, because it's Sunday and I sure as heck don't feel like doing dishes.


I came across this Gourmet magazine recipe while looking for a way to recreate my favorite Whole Foods orzo salad. The first time I made this dish was something of a revelation. As in: really?! I defy you to find anything more lovely than lemon rind marinated in olive oil. And the way the fresh dill compliments the buttery orzo? Forget about it. You can serve this over a bed of spinach, or, if that feels like too much trouble, eat it plain. It's best enjoyed on the couch watching Chelsea Lately


Orzo with Feta and Tomatoes

3 tablespoons extra-virgin olive oil
2 cups cherry tomatoes, halved
1/2 cup chopped fresh dill
1 teaspoon grated lemon zest
1 cup orzo
1 and 1/2 cups crumbled feta (6 ounces)
kosher salt and freshly ground pepper

1. Toss together oil, tomatoes, dill, zest, and 1/2 teaspoon each of salt and pepper in a large serving bowl.
2. Let stand 10 minutes. Breathe in the seductive citrus scent and daydream about lemon orchards in Italy.
3. Meanwhile, cook the orzo in a pot of boiling, salted water until al dente.
4. Drain orzo and toss with tomato mixture. Add feta and toss again. 
5. Send me silent blessings for introducing you to this recipe.