Showing posts with label dessert. Show all posts

the world's most whimsical cookie


Right around this time of year, every year, I take to the kitchen. I play the corniest Christmas music I can find and bake enormous batches of shortbreads, coconut macaroons, chocolate chip cranberry cookies, sugar cookies and caramel pecan squares. (And, in a nod to nostalgia, these.) Then I package them all up in festive tins and give them away to my nearest and dearest. 

To me, it isn't Christmas until I have baked. The homey smell wafting from the oven, the magical transformation of butter and flour and sugar into solid love, the ritual of counting my blessings as I count the cookies – I eat it all up.

This year, I'm adding a new recipe to the repertoire. Essentially a fancy shortbread, cardamom cloud cookies are an absolute dream. They are easy to whip up, endlessly fragrant and utterly beautiful to look at. And the name! Can you imagine a more poetic name for a cookie?

I like to think that these are cookies to keep rather than give away. Unlike the more obvious, ooey gooey treats of the season – I am looking at you, Hello Dolly bar – these mildly sweet, subtle little bites are best suited for solo contemplation. Feel free to enjoy with an enormous mug of milky tea, with the Love, Actually soundtrack playing cheerfully in the background. And a contented smile on your face.

Clouds of cardamom and cashew cookies
Adapted from Padma Lakshmi's Tangy Tart Hot & Sweet
Makes about 2 dozen cookies

1/2 pound (2 sticks) unsalted butter, chilled and cut into pieces
1/4 cup icing sugar, plus loads more for dusty
2 cups flour
1/2 cup raw crushed cashews
2 teaspoons vanilla extract
1 1/2 teaspoons cardamom powder
1/8 teaspoon salt

1. In a bowl, combine the butter and icing sugar to form a stiff mixture. Add the flour, nuts, vanilla, cardamom powder and salt. Mix well to form a dough. Let stand 30 minutes, covered, at room temperature.
2. Preheat oven to 325 F. Line a baking sheet with parchment paper.
3. Make small balls of the dough and place them on baking sheet. Smash with palm of your hand. Make sure cookies don't touch.
4. Bake for 20-25 minutes, until bottoms are light brown. Remove from oven and dust generously with icing sugar. Cool on racks.

no-effort rice pudding


The thing about cooking is that the less you do of it, the more daunting it seems. And then the lazier you get. 

From time to time (read: often), I get caught up working long hours (read: going to cocktail parties and events after hours) and before I know it it's been weeks since I cooked a proper meal. In spite of the hundreds of cookbooks that litter my home, I forget that I know how to cook. Everything seems just a touch too intimidating. And way too much effort to bother with.

Then I am back to absentmindedly eating sushi for dinner at my desk and looking at coffee and drugstore chocolate as an acceptable lunch. And that, as we all know, is just no way to live. Quite joyless, don't you think? 

To ease myself back into the life of the kitchen, I must keep things very, very simple. A little green salad, dressed with oil and fine balsamic vinegar, and penne tossed with a good solid pesto from the market. Followed by the easiest dessert that can be whipped up and still considered homemade: the little rice pudding that could.

It's the ultimate comfort food, with the least possible fuss. You will find that it is as simple as stirring together a few ingredients in a ramekin and then plopping it in the oven. When it comes out, all warmth and sweetness, it will taste like home. And then you will remember, one more time, that home food truly is the best food – and that it's completely, totally worth the (slight) effort that it takes to prepare it. You'll be back cooking in no time. Promise.

Individual rice pudding
Adapted from Epicurious
Serves 1

1/2 cup of milk, plus a splash for serving
4 teaspoons Arborio rice
2 teaspoons sugar
pinch of salt
pinch of nutmeg
splash of vanilla
butter, for ramekin

1. Preheat oven to 325 F.
2. Butter one ramekin (just under a cup capacity is good).
3. Add milk, rice, sugar, salt, nutmeg and vanilla. Give it a quick stir.
4. Place ramekin on baking sheet and bake, in the middle of the oven, until most of the milk has been absorbed, about one hour. 
5. Cool pudding on rack.
6. Discard skin, stir in extra milk. 
7. I like to bake a little stone fruit to serve on the side, but if this is too much trouble for you, best to leave well enough alone.

celebration chocolate pots


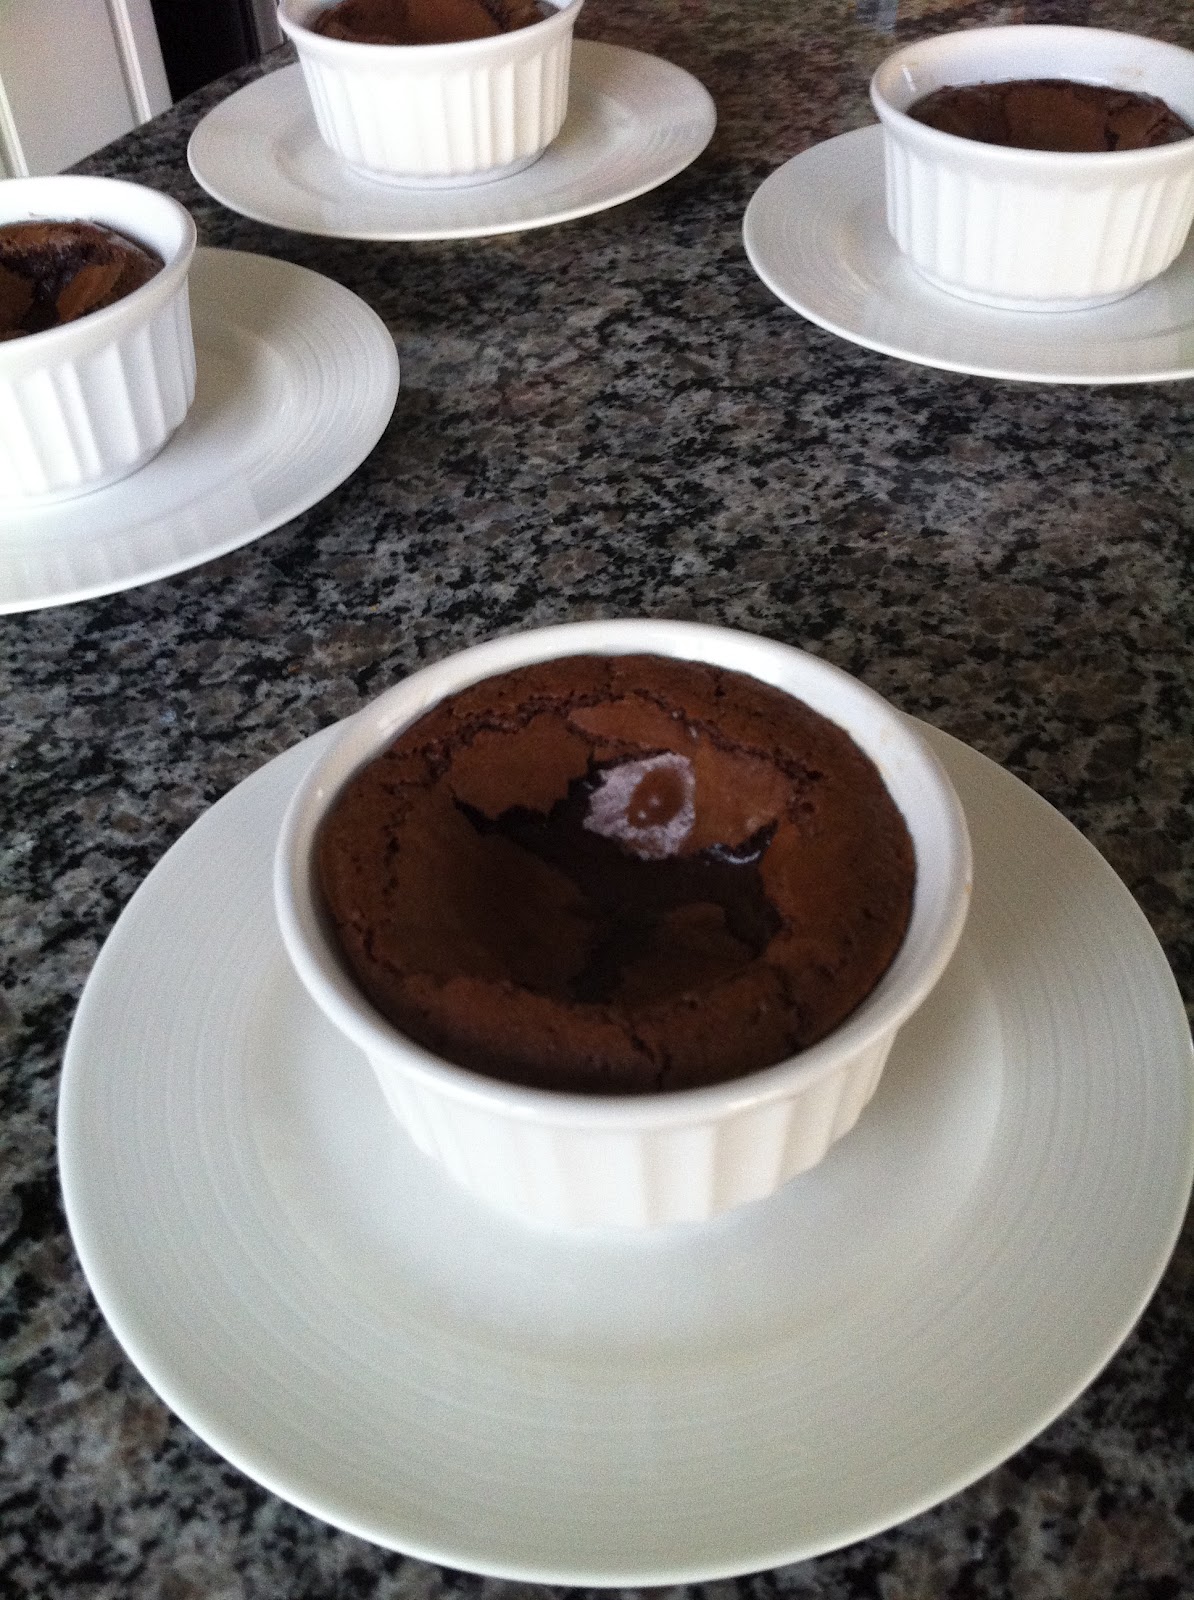
Do you ever get the feeling that you are right where you are meant to be – at the right place, at the right time, doing exactly what you are meant to be doing? As it turns out, I often feel that way when I bake these chocolate pots. I love everything about them: the elegant look, the heavenly smell, how happy they seem to make people. And obviously the decadent, brownie-like tops and the rich pools of chocolate pudding lurking within are nothing to sneeze at either. 

Clearly I have developed a sentimental fondness for this sweet little dish. I think it's because I've served them over and over to people that I am fond of, and they've become something of a tradition in my circle. 

I had a friend over for dinner the other night and I took great pleasure in introducing her to this recipe. As I told her, what's especially lovely about these is how well they work for dinner parties. Whip them up early and then cover in plastic wrap and stash in the fridge while you make the rest of the menu. About an hour before dinner, preheat the oven, take them out of the fridge and allow to come to room temperature. When dinner is served, put them in the oven to bake. As people finish eating they will begin to smell the aroma of chocolate. I guarantee you will enjoy the looks on their faces. Leave little gems to cool while you make the coffee, and then serve them to your drooling diners. And feel free to play a little Otis Redding while you're at it. Or perhaps some Mingus

This recipe is, of course, from Nigella Lawson, a woman who knows a thing or two about desserts. Not to mention the art of living. (Hint: happiness has nothing to do with pointless depravation. Not one single thing.)

Chocolate Pots, aka easiest dinner party dessert ever
By Nigella Lawson, makes 4 
¾ cup semisweet chocolate chips
just over a stick of soft, unsalted butter
2 eggs

¾ cup of sugar
3 tablespoons flour


1. Preheat oven to 400F.
2. Place a metal bowl over a pot of gently boiling water. Add the chocolate chips and the butter and allow to melt slowly.
3. Use the wrapper from the butter to grease four ramekins (just under a cup volume each).
4. Cool the melted chocolate mixture.
5. In a mixing bowl, beat eggs.
6. Add sugar and whisk.
7. Spoon in flour and whisk. 
8. Fold the cooled chocolate into the egg mixture and stir to combine.
9. Pour into ramekins, place on baking sheet and cook for about 20 minutes, until top is cracked. (Middle should still be gooey and molten.)
10. Cool chocolate pots for 15-30 minutes and serve.

sweet nothings


Like small children, I would prefer to have dessert after every single meal. But we can't all get what we want all the time, now can we? And anyway, we wouldn't enjoy it very much if we did. 

The truth is that I don't feel great when cakes are in regular rotation, and I'm not a fan of struggling into tight clothing. Plus, whenever I overdo anything it gets a bit dull and mindless. So as much as I would like to follow every summer salad with a chocolate torte, these days I'm trying to save indulgences for special occasions. But that doesn't mean I can't satisfy my sweet tooth on a daily basis – and really savour the experience. Call it having your cake and eating it too. 

I have discovered that you can eat something sweet every night without throwing yourself out of balance. The secret is to trick yourself with fruit-based, healthy concoctions. (Thank you, Mireille Guiliano.) This is easy to pull off during the summer, when markets are brimming with all things juicy. Behold this little slice of heaven:

Peaches & Cream, the remix
Serves 1 delighted diner

1 peach, sliced in bite-sized pieces
1/2 tablespoon of brown sugar
1 tablespoon of Greek yogurt
1 teaspoon of milk
pinch of cinnamon
several mint leaves, torn

1. Turn on the broiler of your oven.
2. Line a baking sheet with parchment paper, arrange peach slices on top and sprinkle a pinch of sugar on each piece.
3. While the peaches are caramelizing under the broiler, thin the yogurt out with the milk and stir in the cinnamon.
4. When peaches are browned slightly and bursting with flavour, remove from oven. Cool slightly, drizzle with cinnamon cream and sprinkle with mint. 

icing on the cake


If I care about you, I will bake for you. And, sooner or later, chances are good that I will make you these cupcakes. I have been baking them for years. I've whipped them up for office celebrations, dinner parties, kids' birthdays – and once, for a wedding of 60. It remains one of my favourite ways to express affection for family and friends. 

The recipe is as simple as it gets. And almost as quick as one of those soulless, synthetic boxed cakes. In short, the perfect gift to give.  


Butter Cake (adapted from The Laura Secord Canadian Cookbook)
Makes 12 cupcakes

1 1/2 cup all purpose flour
1/2 tsp salt
2 tsp baking powder
1/2 cup butter
1 cup sugar
2 eggs
1 tsp vanilla
3/4 cup milk

1. Preheat oven to 350F.
2. Line muffin tins with paper cups.
3. Sift together flour, salt and baking powder.
4. In a separate bowl, cream butter.
5. Gradually blend in sugar, eggs and vanilla. Beat until light and fluffy.
6. Add dry ingredients to butter mixture alternately with the milk. Make 3 dry and 2 liquid additions.
7. Spoon batter into muffin cups. Bake for about 20 minutes, or until bottoms are golden brown and cake springs back when lightly touched (a toothpick should come out clean).
8. Cool and then spread with basic butter icing.

Basic Butter Icing
Makes enough for 12 cupcakes

1/4 cup butter, room temperature
2 cups icing sugar
1 1/2 tbsp milk or cream
1 tsp vanilla

1. Cream butter.
2. Gradually blend in icing sugar.
3. Add milk (or cream) and vanilla.

best ever chocolate chip cookies


Growing up, my dad always said that the only constant in life was change. But, as it turns out, the only constant in my life is Jon Stewart. That, and chocolate chip cookies. To my mind, there are few things in the world more comforting – more steadfast – than warm cookies and a tall glass of milk. And a side order of deliciously smug political satire.

I copied this recipe from a friend (I think she got it from The Fanny Farmer Cookbook) about 12 years ago and have carried it around ever since.


I'm moved cities, I've moved jobs, new people have come into my life – but I've always made these cookies. They're the perfect combination of crisp and chewy, and are generally a hit with kids and adults alike. I skip the nuts, but at Christmas, when I bake a tin of treats for everyone that I'm close to, I add cranberries.

When I take these cookies to parties, I often reserve a small amount of dough in the fridge. That way, when I get home, I can crank up the oven and indulge in a late-night treat. It's nice when some things stay the same, no?

Best Ever Chocolate Chip Cookies

1 1/8 cup flour
1/2 cup butter
1/2 cup dark brown sugar
1/2 cup granulated sugar
1 egg
3/4 teaspoon vanilla
1/2 teaspoon salt
1/2 teaspoon baking soda
1 cup semi-sweet chocolate chips
1/2 cup nuts (optional)

1. Preheat oven to 375 F.
2. Cream butter and add sugars. Beat until light and smooth.
3. Add vanilla and egg.
4. In a separate bowl, mix flour, salt and baking soda.
5. Add dry to wet. Stir until combined.
6. Add chocolate chips (and nuts, if using).
7. Drop spoonfuls on a cookie sheet and bake 8-10 minutes, until lightly browned.